How to create product add-ons?

Ridhu Pharan
Last Update vor 3 Monaten
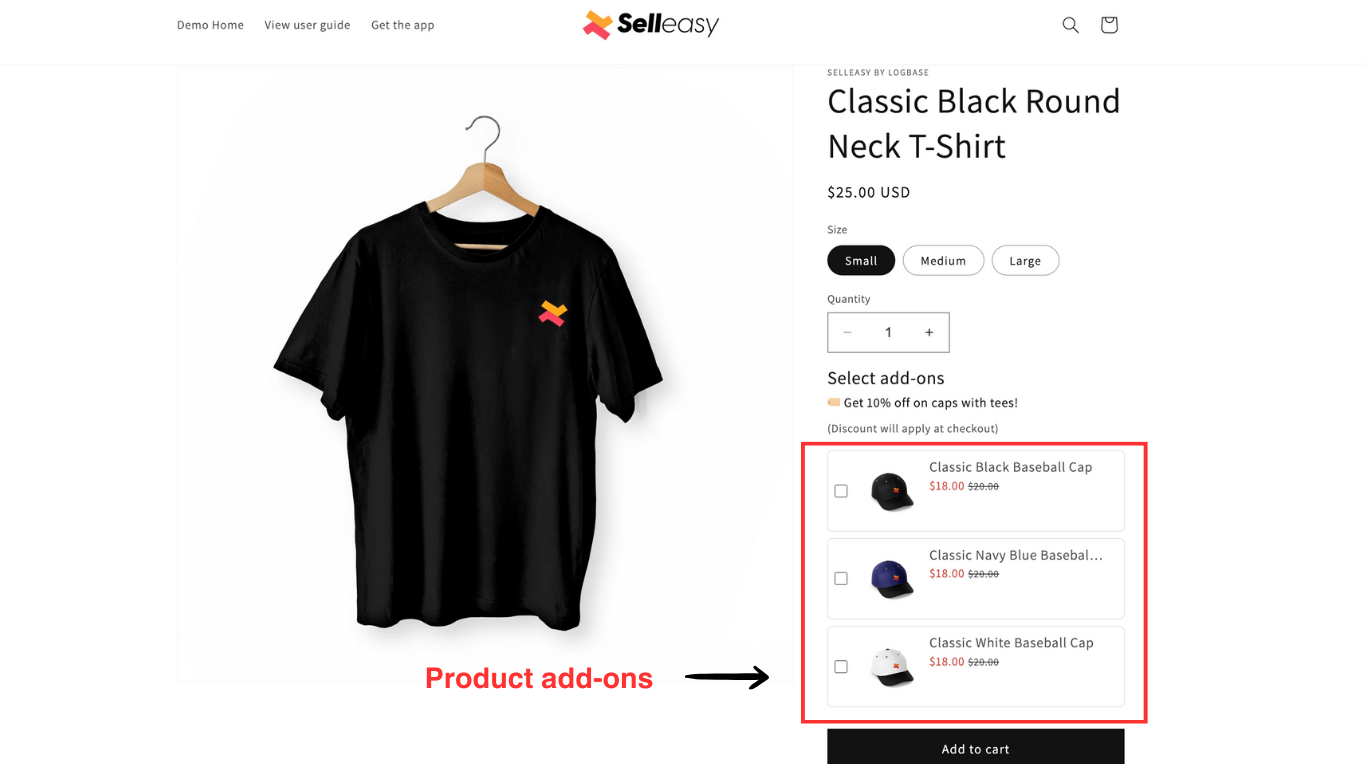
Upsell more products on your Shopify store with the product add-on options. Here's a simple guide to upsell one or more products in just a few minutes.
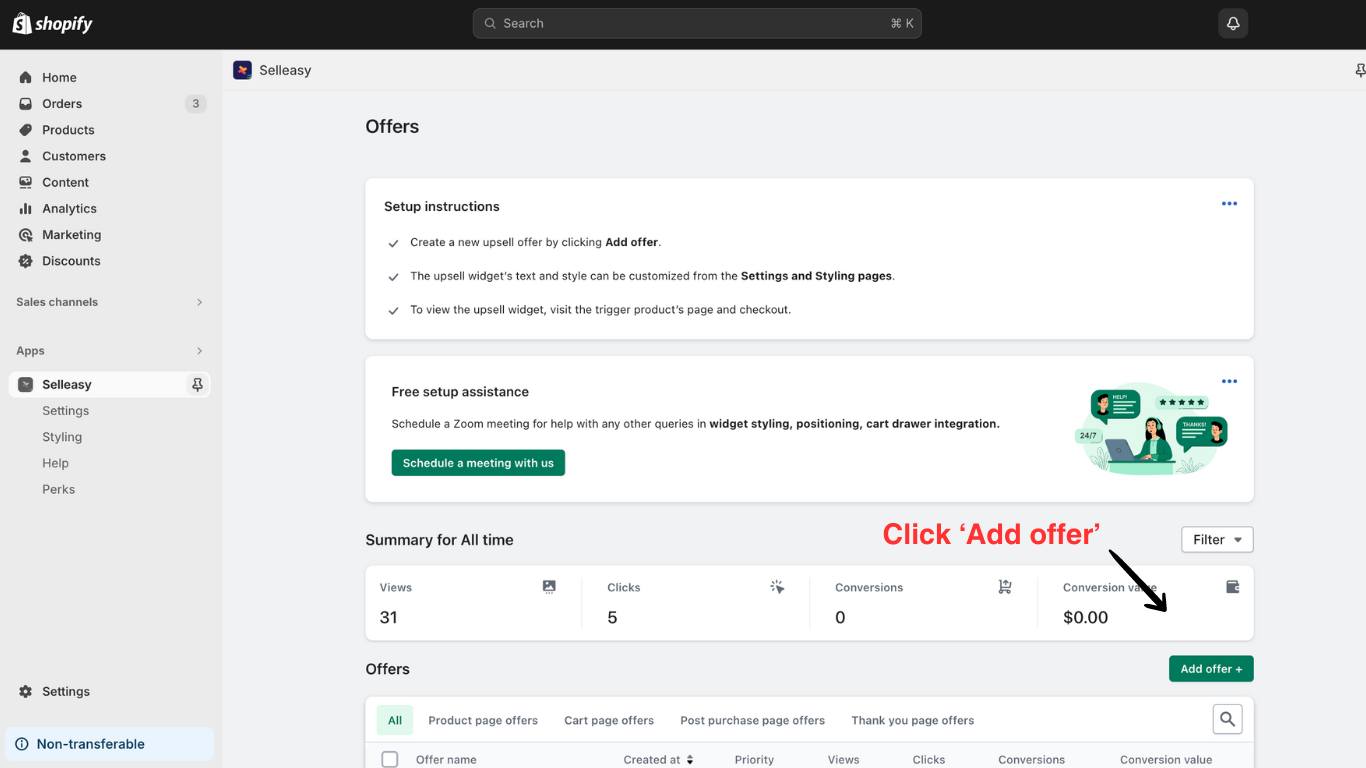
1. Click 'Add offer' to create your product add-on offer.
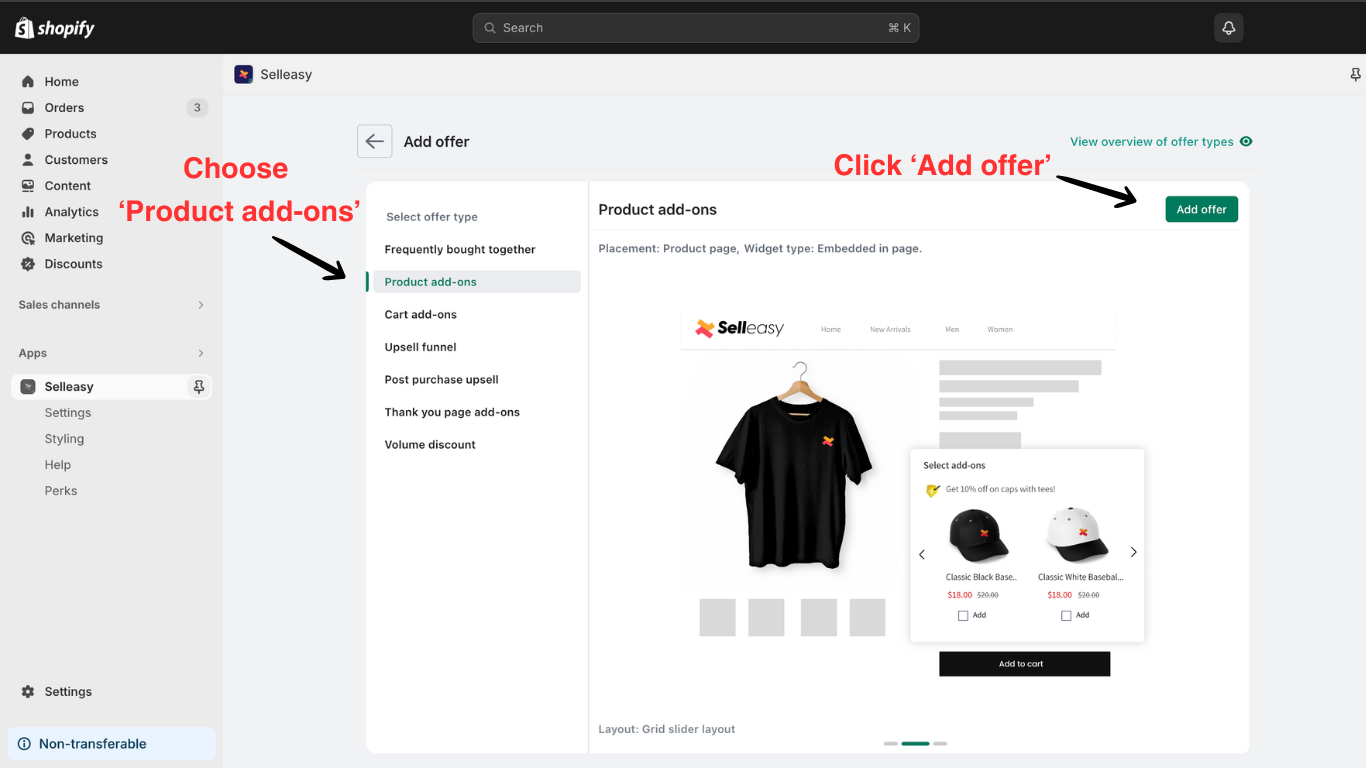
2. Choose the 'Product page' section and click 'Add offer' of the products add-ons
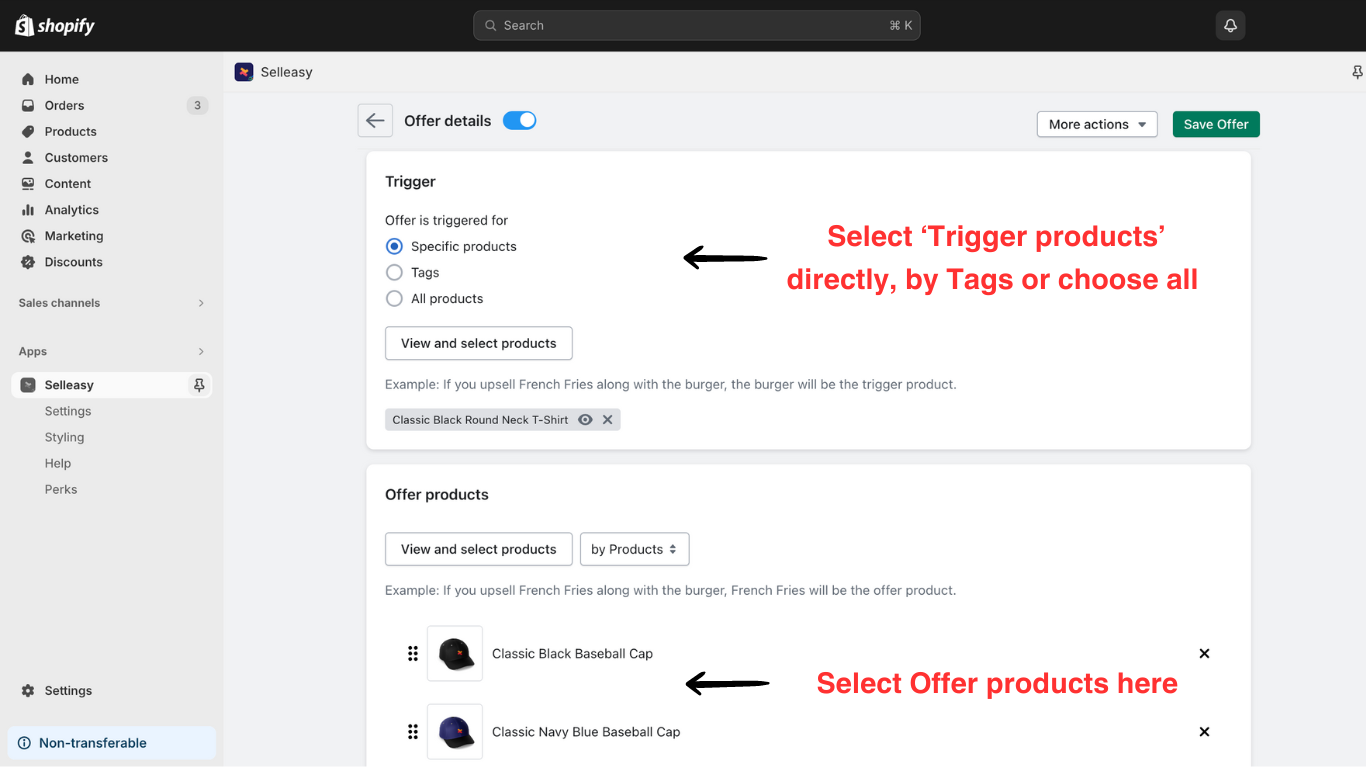
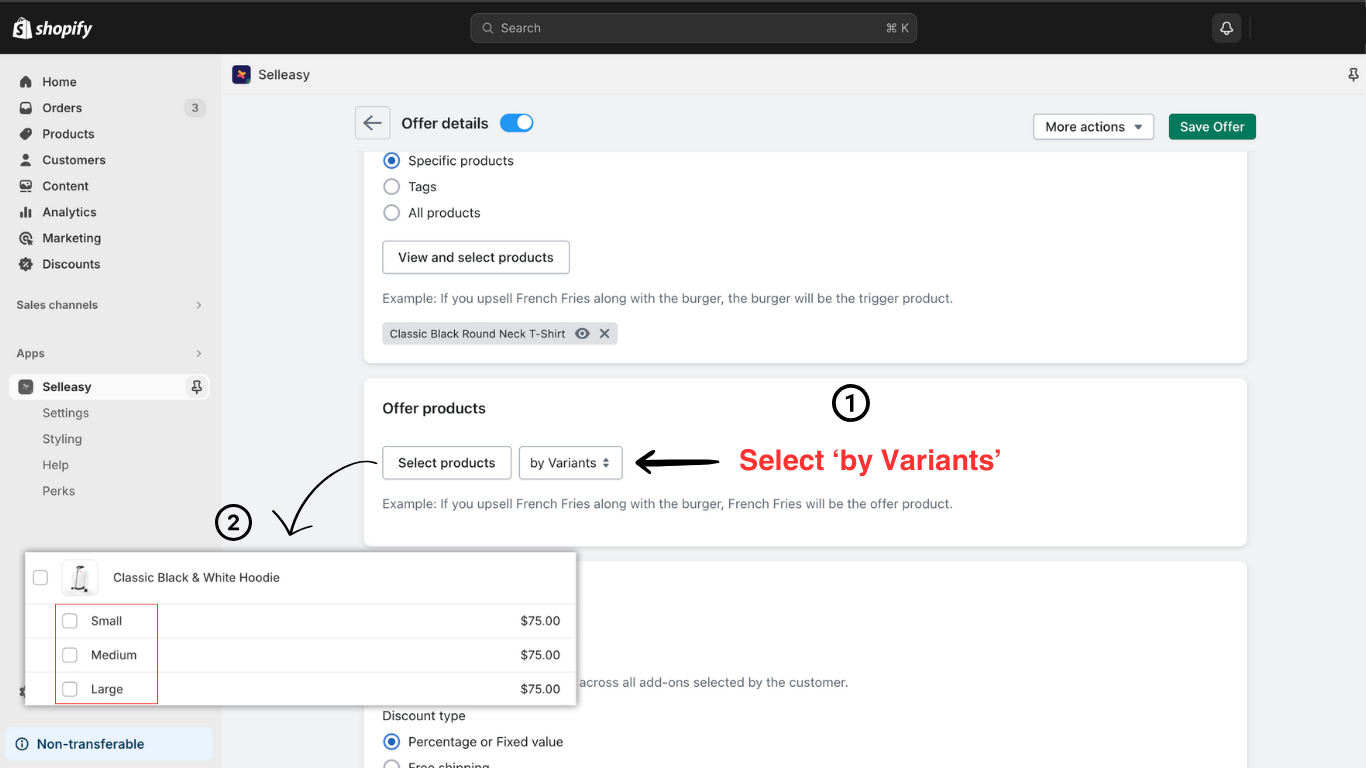
3. The Product add-on offer allows you to choose ‘Trigger’ products and ‘Offer’ products.
- Trigger product is the primary product the customer intends to buy.
- Offer products are the products you wish to promote along with the trigger product.
You can also select products based on multiple variants. For example, for a T-shirt the variants can be Small, Medium, and Large
Choosing a trigger product
- Specific product - View and select the products
- Tags - Select existing product Tags (eg. Women's, Men's, etc)
- All products - Select all your products at once
Note: Before setting up an offer; make sure the offer products are in stock, the offer must have an image, and be in active status on the online store
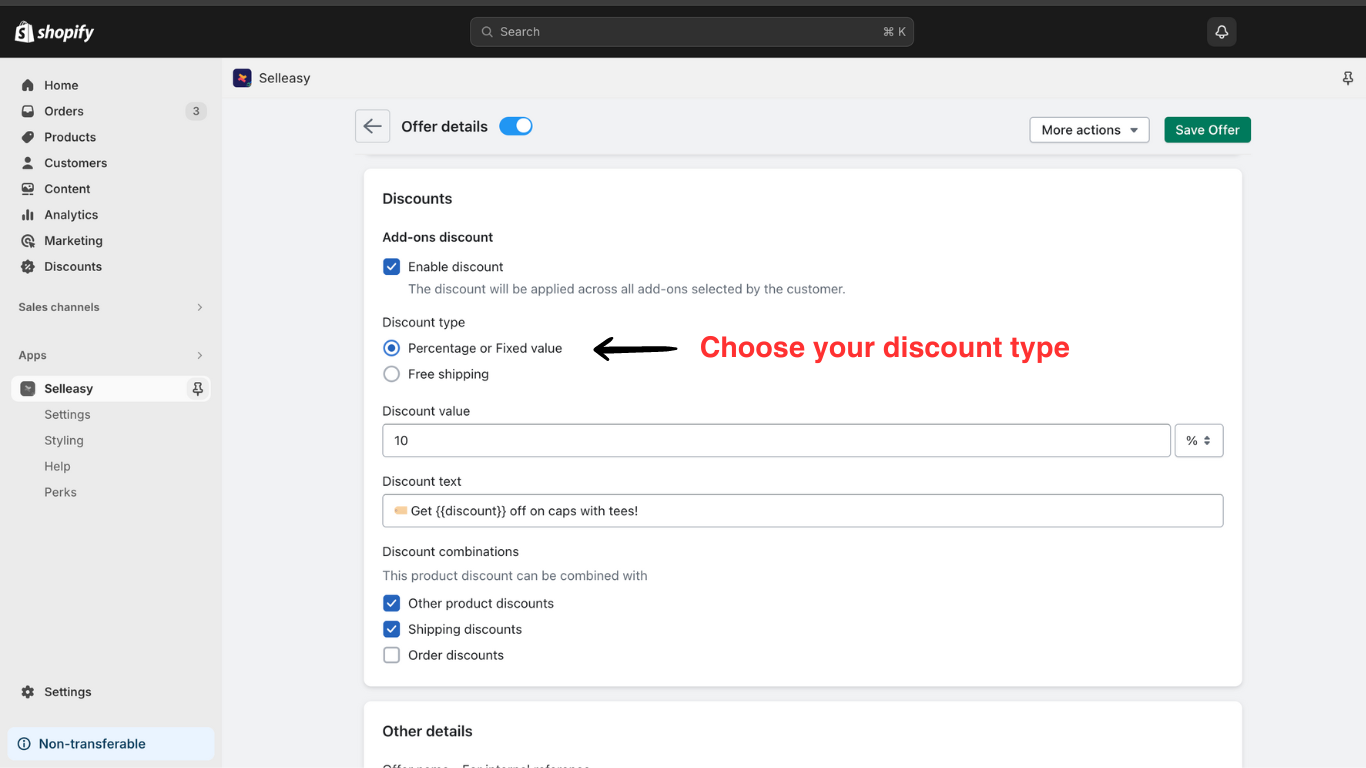
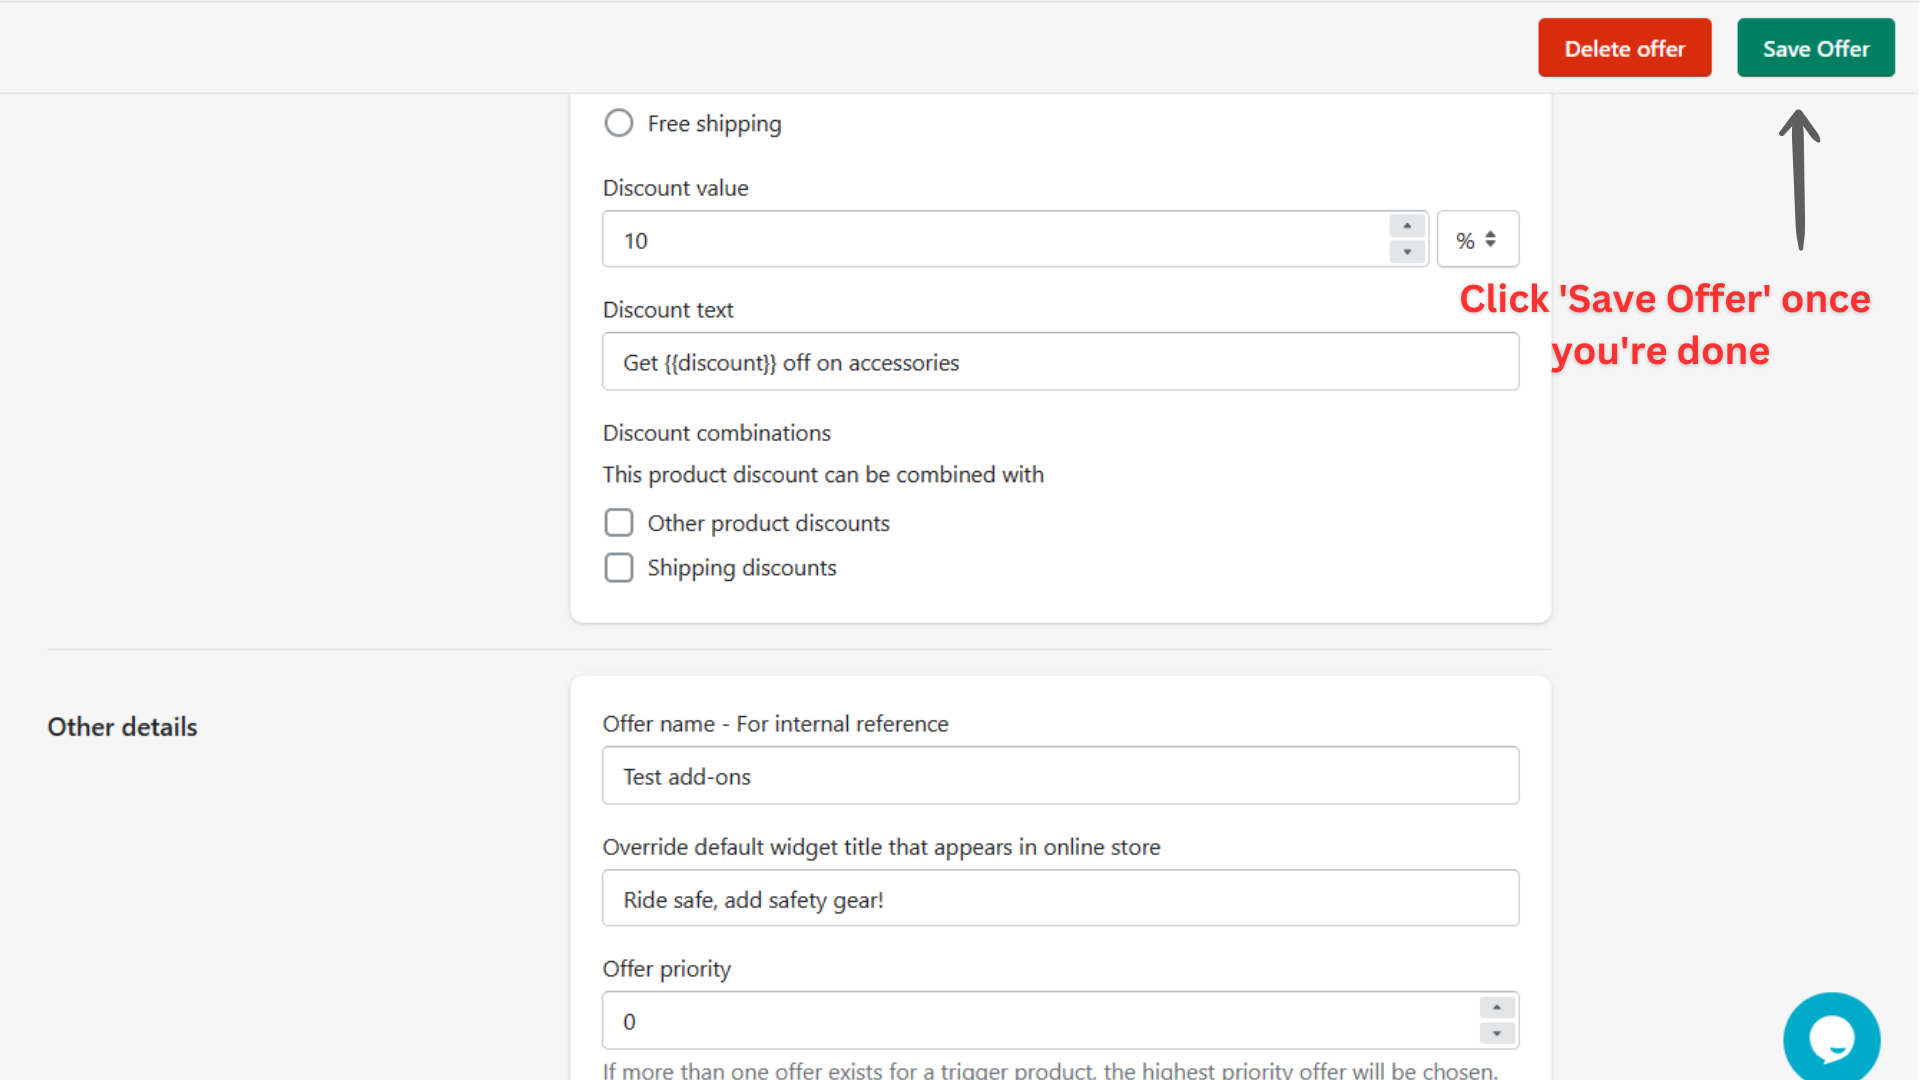
4. You can also enable the ‘Discount’ (optional) to offer discounts to your customers for choosing the offer products.
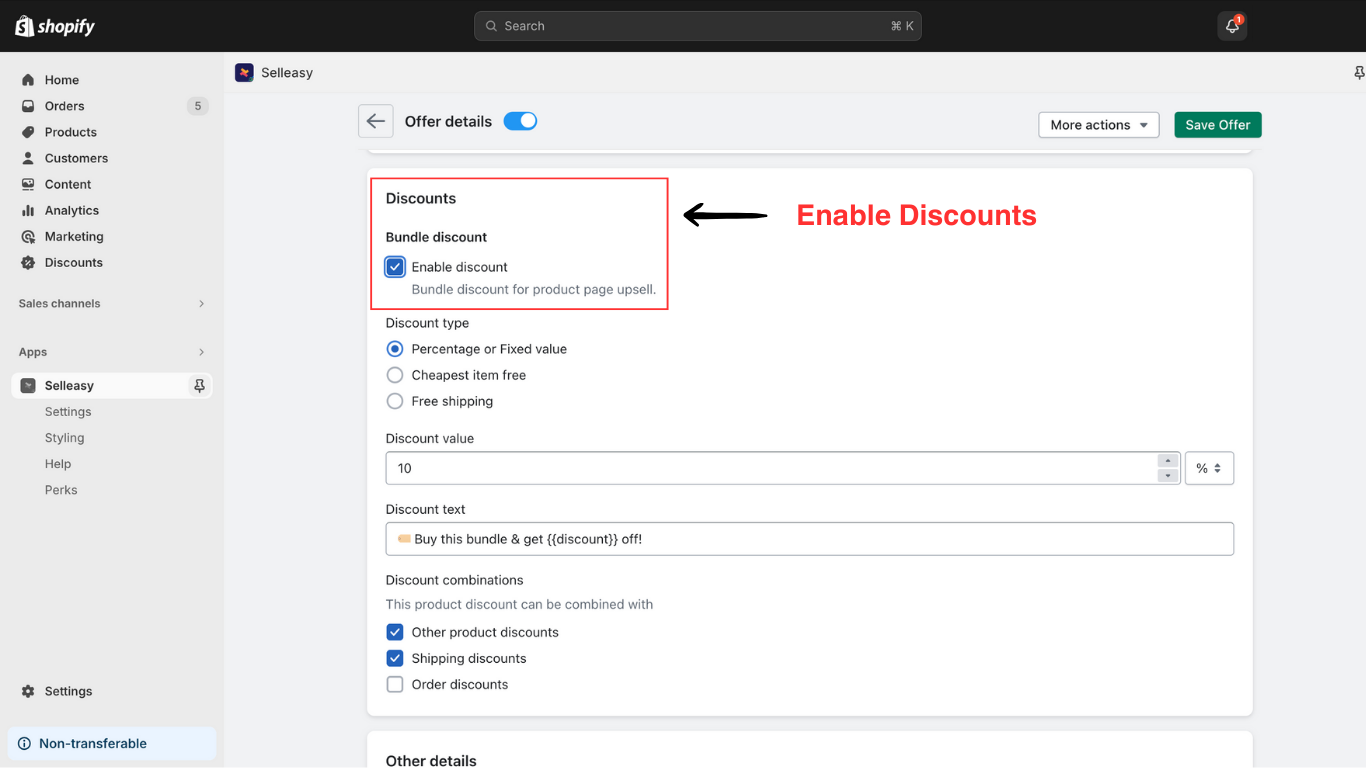
Discount options available are:
- Percentage or fixed value
You can set a percentage value to be discounted or set a fixed value that will be deducted from the original cost.
- Free shipping
This option allows you to offer your customers free shipping service for the entire order upon choosing the product add-ons.
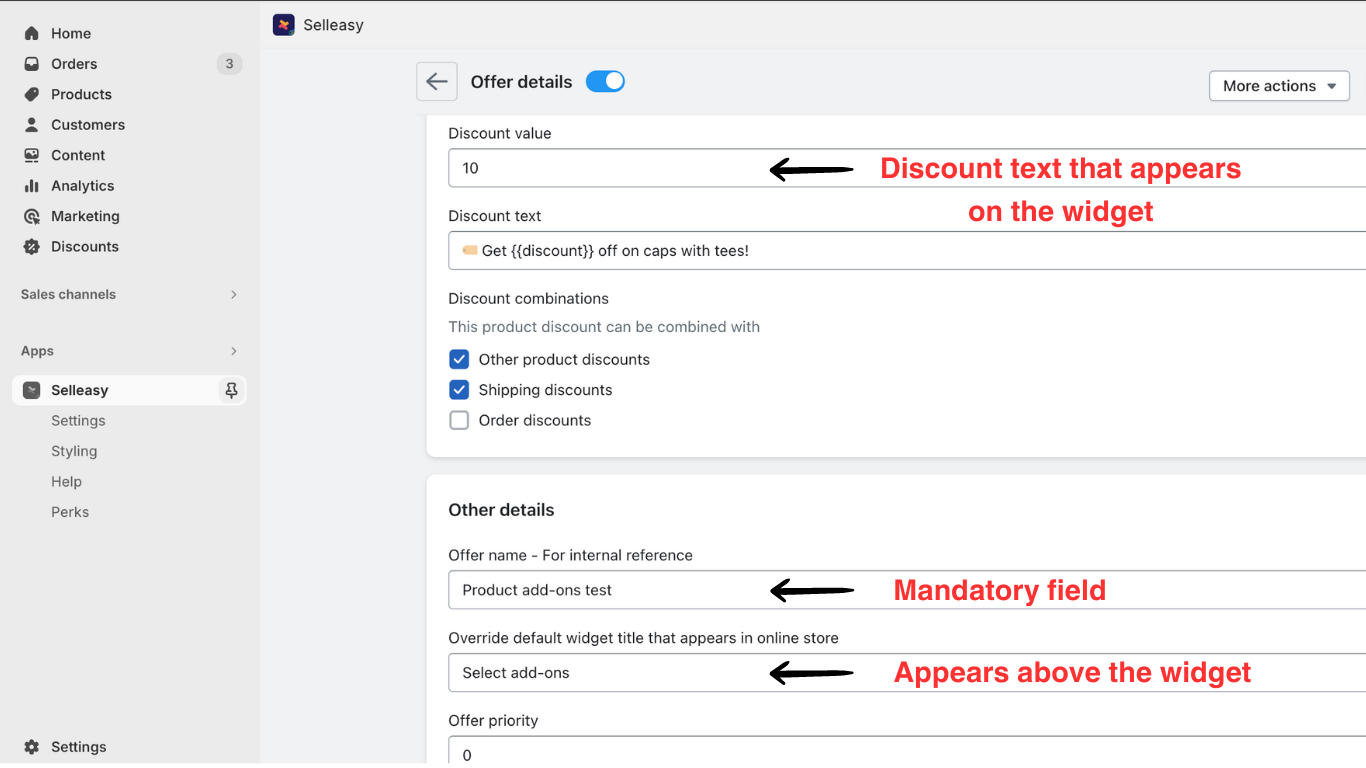
5. Make sure to give an ‘Offer name’ (mandatory field) which is only for your internal reference and will not appear on the product page. You can also customize the widget title here.
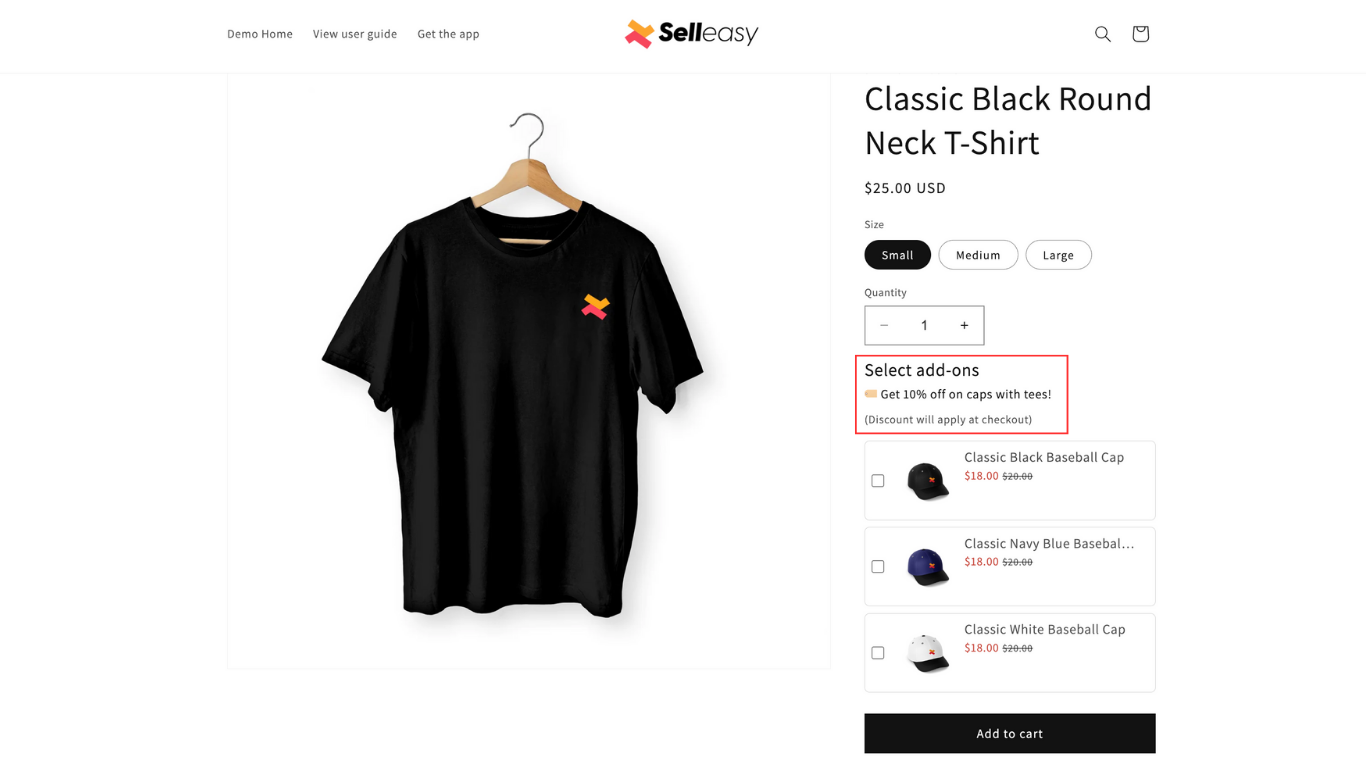
Here’s how it appears on the product page when you’ve added the widget title and discount text

6. Once you’ve completed the setup, click ‘Save offer’ and you can now view the Product add-on offer for the product.
7. Verify if the 'Product add-ons' widget appears correctly. If you do not see the widget or if the styling has some issues please reach our 24/7 support team and we'll help you out.
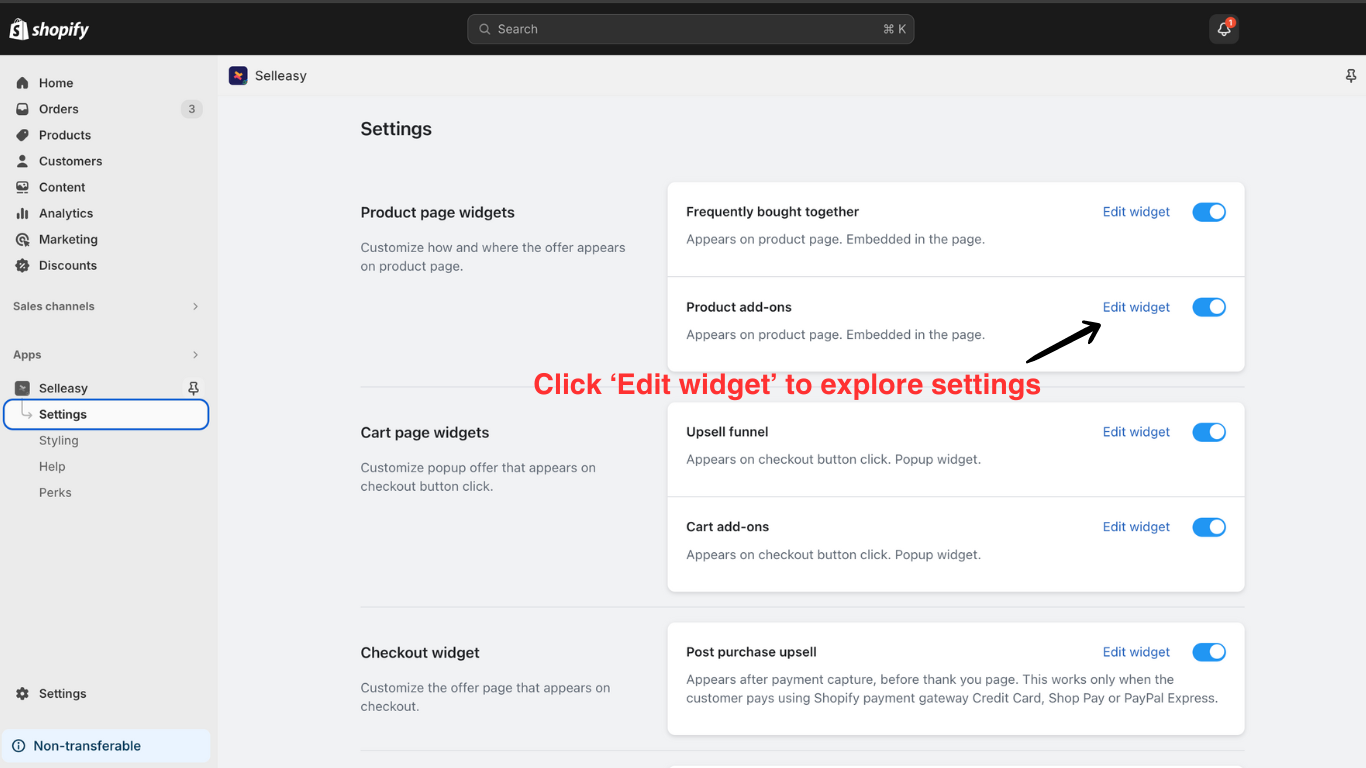
8. You can also customize the position and contents of the widget on the Settings page. Click ‘Edit widget’ to explore the options.
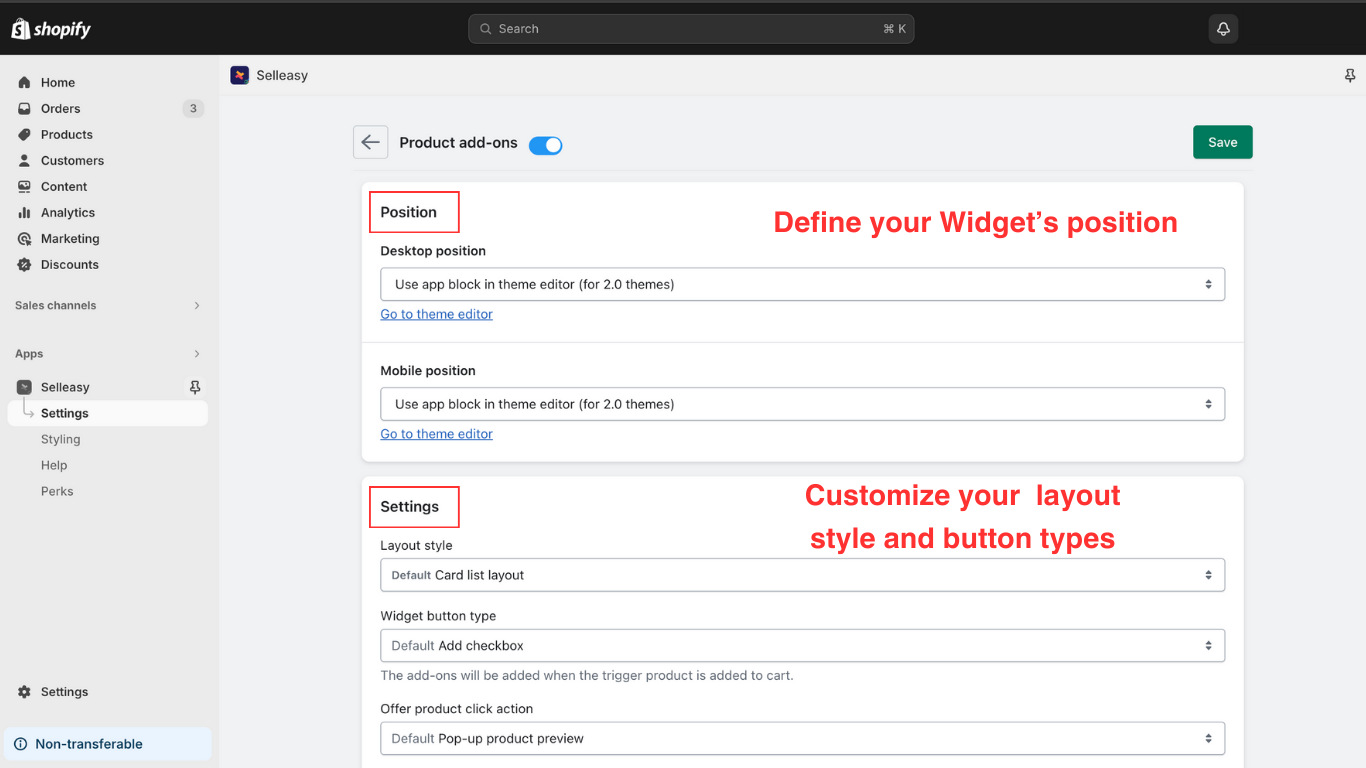
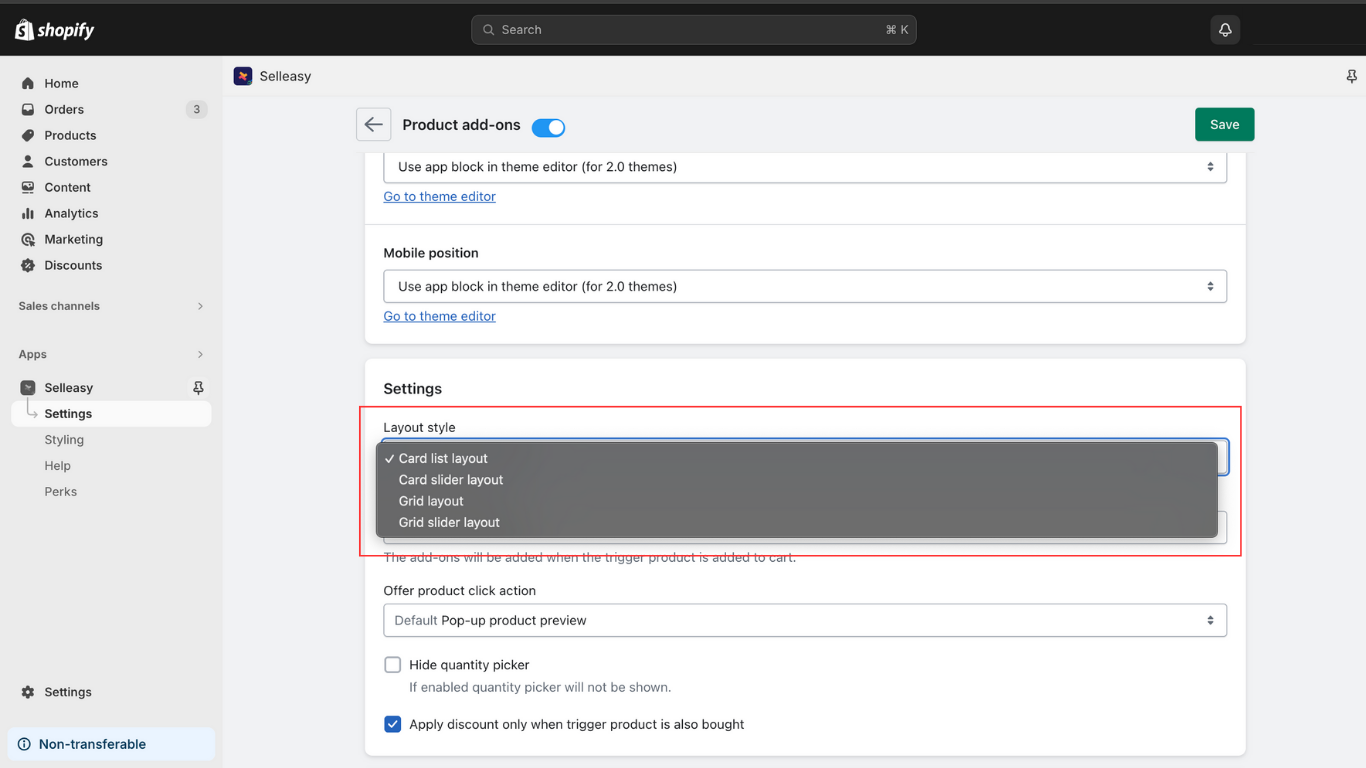
9. On the ‘Edit widget‘ page, you can customize the position of your product add-on widget to appear on the product page. You can also make changes to the widget's layout style, define actions to clicks and add discount conditions.
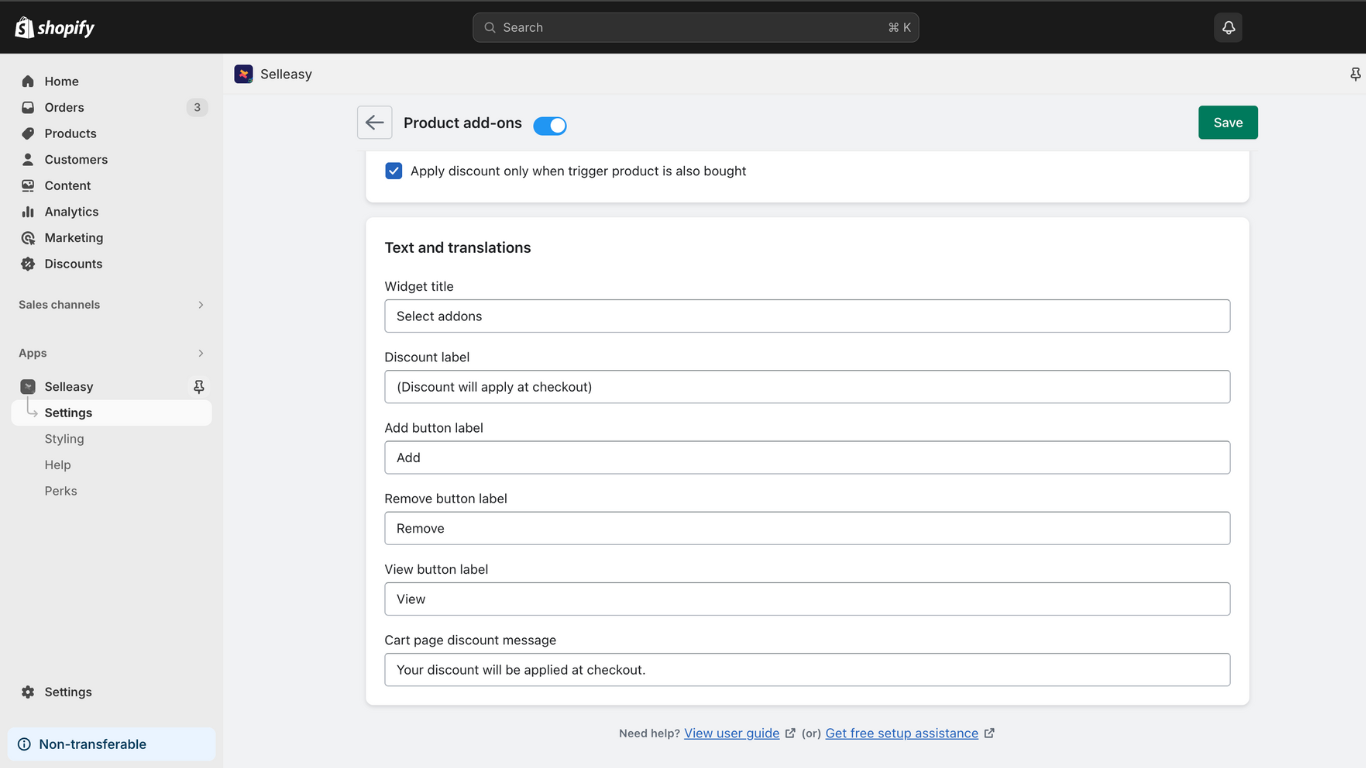
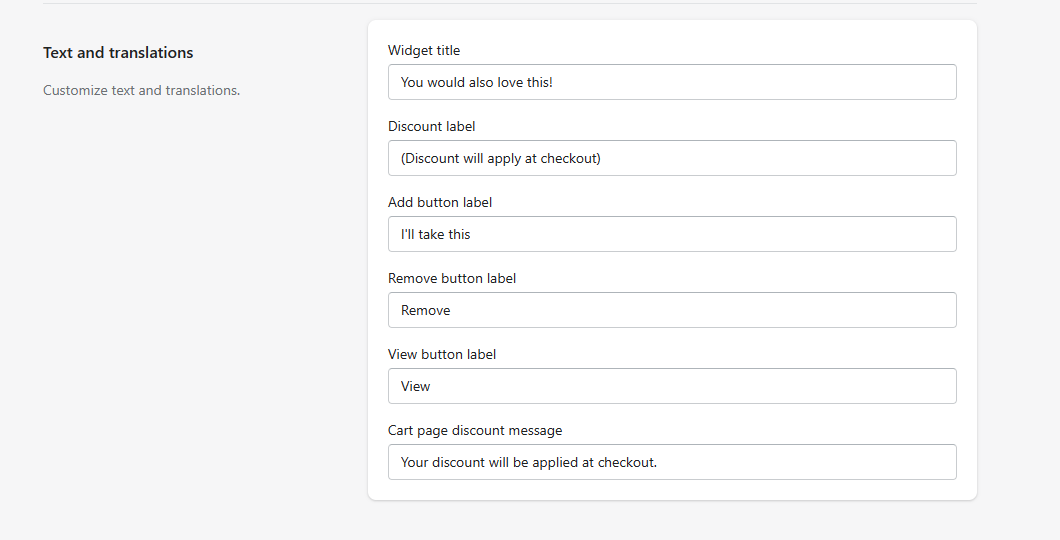
10. In the ‘Text and translations’ section, you can add or customize the default content to add the widget title, price label, add button label, discount label, etc.
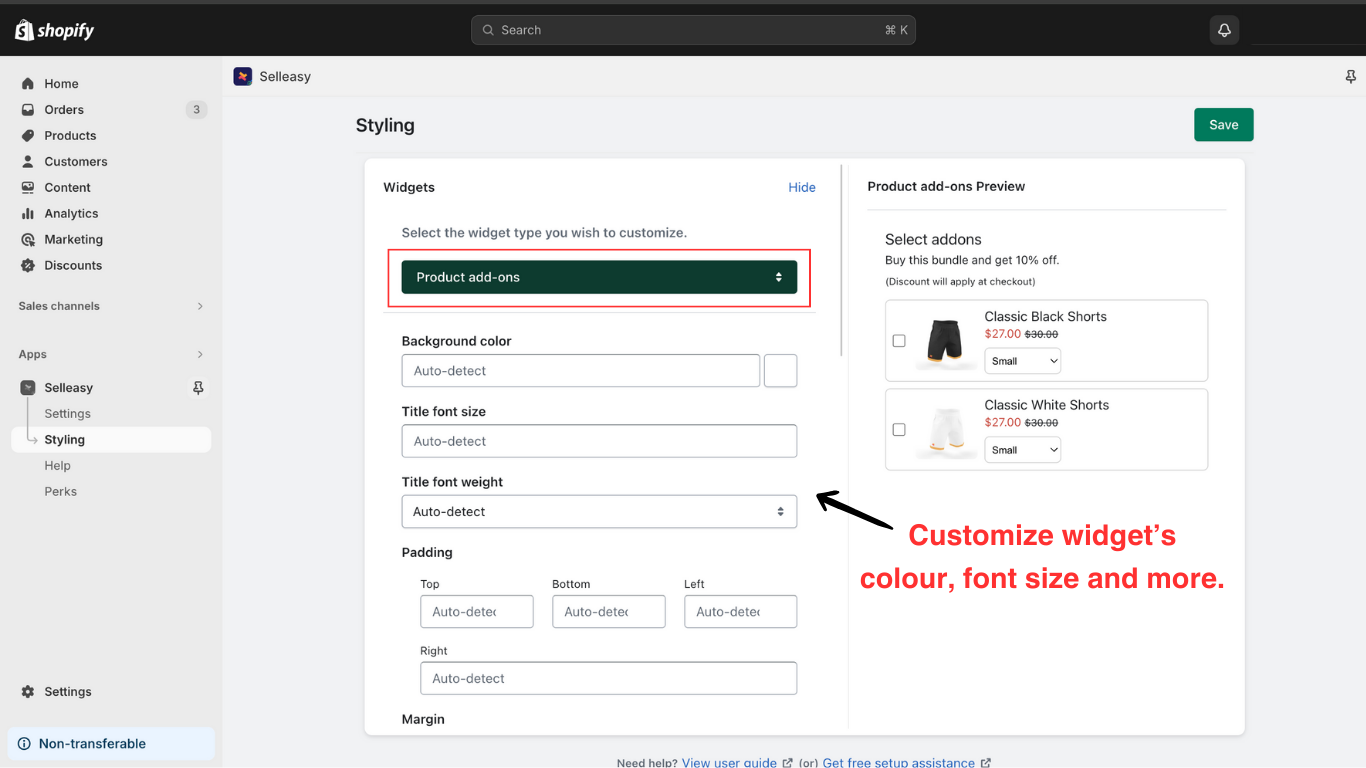
11. Visit the ‘Styling’ page where you can customize your widget styles such as the background color, widget size, font size, and font-weight etc. Make sure to select ‘Product add-ons' from the slide button of the ‘Preview’ section.
Note: The styling options are available only for layout styles such as 'Card list layout' and 'Card slider layout'.
If you choose 'Grid layout' or 'Grid slider layout', you cannot make the styling changes, however, you can contact us to make the customizations.
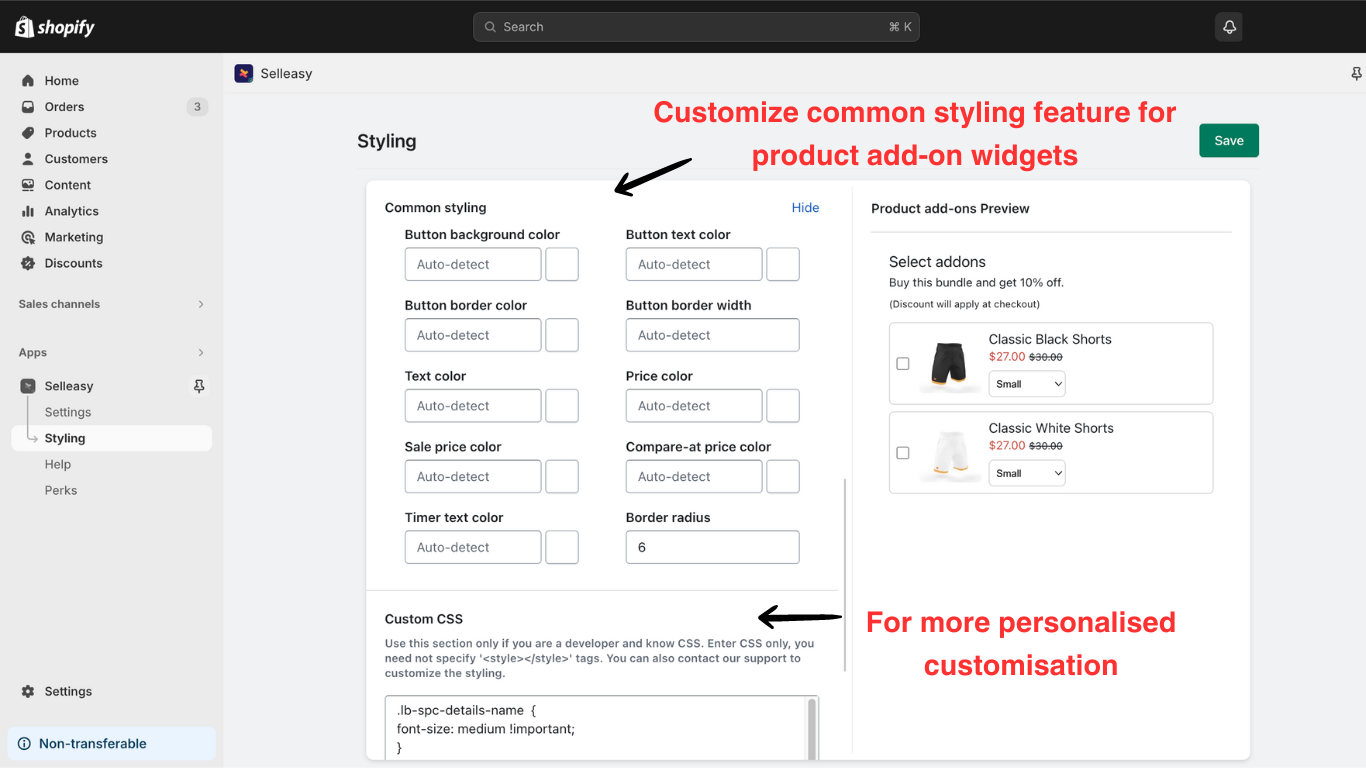
To make common styling changes to the widget of all your offers like button color, text color, border radius, etc, you can make it in the ‘Common styling’ section.
More widget customization can be done in the 'Custom CSS' section. You can reach us for this extended support.
This user guide will help you set up a 'Product add-on' offer on your Shopify store with the Sellasy app. For more support, click the Chat icon on the bottom right of the page to get 24/7 assistance.